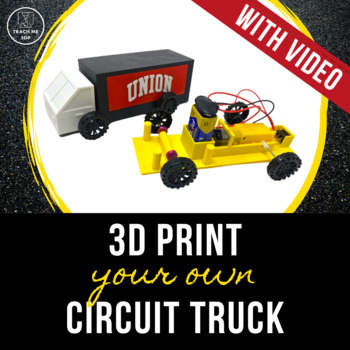
3D Print Your Own Truck Using a Simple Circuit | A Tinkercad Tutorial
- Zip
Description
In this step-by-step tutorial students learn how to create a truck that actually moves using a simple battery circuit. This is a fun and meaningful project for learning about circuits and electricity. The tutorial is broken down into two parts, so you can choose whether you want students to only design the truck base (the part necessary for it to run) or whether you want them to also add a customized cab and trailer. Students (and adults, too) love racing their cars against one another.
Overview
Do you have a 3D printer but aren't quite sure what to do with it? Are you looking for ready-to-go projects to teach your students valuable 3D design / CAD skills? Do you need creative, engaging STEM activities? Then Teach Me 3DP Tutorials were designed for you.
You will receive the tutorial in 3 different formats.
1. There is a Video that walks your students (or you) through the process step-by-step.
2. The Booklet format is a .pdf file designed to be printed double-sided on the short-edge. Fold the stack of papers in half, staple along the fold to create a booklet.
3. The Screen format is designed to be viewed on screen or printed as single sheets.
You will also receive the .stl files for the finished products so that you can quickly print them out if you need to.
*****************************************************************************
Experience Level:
This is a Level 2 tutorial, meaning that it is designed for students who have some 3D design experience. Students should already be comfortable opening Tinkercad and creating a new design. They should already be familiar with basic 3D design functions, such as creating, re-sizing, rotating, grouping, duplicating and aligning objects. The Level 2 (Intermediate) tutorials allow students to perform the above tasks more independently, while teaching them to use more advanced techniques, such as using the ruler and workplane features to precisely position objects.
*****************************************************************************
Required Resources:
To use the tutorial, you will need a computer with Internet access. If you are using the tutorial with a class, you would ideally be in a computer lab with one computer per student. The tutorials will also work well for distance learning, as long as your students have computers or tablets at home.
Prior to using the tutorial with a class, you should "create a class" on Tinkercad. Check out my free guide Tinkercad for Teachers if you are unfamiliar with the program.
To print the created project, you will need a 3D Printer and Filament (PLA filament recommended).
To assemble the circuit, you will need:
a TT motor, such as these
a kit such as this one (which includes a rocker switch, axles, 4 wheels, a 9V battery clip, and wire)
a 9V battery
*****************************************************************************
Tips for in-class use:
• Option 1: Give each student a printed copy of the tutorial. Let them follow it at their own pace. This option is particularly useful for classes in which students' computer experience levels vary greatly.
• Option 2: Have each student open the video file or the Screen version of the tutorial. Show students how to have 2 windows open simultaneously on their computers. They should have the tutorial open in one window and Tinkercad open in the other. This option works best if your printing/copying resources are limited and your students are experienced computer users. This would also be a great option for distance learning.
• Option 3: Use a projector to display the tutorial. Have students follow along as you go through the tutorial step-by-step. This option will be the best for younger students and for those with limited computer experience.
*****************************************************************************
Other products that may interest you:
3D Print Your Own Action Figure
*****************************************************************************
Follow Teach Me 3DP on TPT to learn about all of our latest products and sales.


