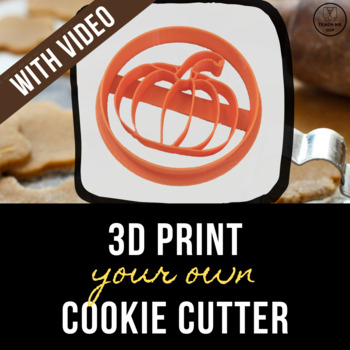
3D Print Your Own Cookie Cutter
- Zip
What educators are saying
Also included in
- Fall is in the air and on the 3D printers! This bundle provides you with everything you need to teach your students (or yourself) how to design a candy bowl, a beverage coaster, and a cookie cutter. Each project is designed using Tinkercad, a free, easy-to-use but powerful CAD program.OverviewDo yoPrice $12.00Original Price $15.00Save $3.00
- Fall is in the air and on the 3D printer! Use these step-by-step tutorials to teach your students (or yourself) how to create 3D Printable objects. This Mega Bundle includes complete tutorials to show you and your students how to create: a Candy Bowl (Level 1)a Coaster (Level 1)a Cookie Cutter (LevePrice $32.00Original Price $41.00Save $9.00
- This huge mega bundle includes projects to keep you and your students 3D printing the entire year! From fall to winter to spring to summer, each project includes a step-by-step design tutorial, as well as a video guide. This mega bundle provides you with everything you need to teach your students (oPrice $105.00Original Price $150.00Save $45.00
Description
Learn to design your very own cookie cutter using Tinkercad. In this step-by-step tutorial your students (or you) will create a custom-designed 3D printable cookie cutter. Make any design you wish! A yummy way to enjoy some STEM!
Overview
Do you have a 3D printer but aren't quite sure what to do with it? Are you looking for ready-to-go projects to teach your students valuable 3D design / CAD skills? Do you need creative, engaging STEM activities? Then Teach Me 3DP Tutorials were designed for you.
You will receive the tutorial in 3 different formats.
1. There is a Video that walks your students (or you) through the process step-by-step.
2. The Booklet format is a .pdf file designed to be printed double-sided on the short-edge. Fold the stack of papers in half, staple along the fold to create a booklet.
3. The Screen format is designed to be viewed on screen or printed as single sheets.
*****************************************************************************
Experience Level:
This is a Level 1 tutorial, meaning that it is designed for beginners who have limited or no previous 3D design experience. More advanced users will probably also learn some new tips and tricks. Each step is described and illustrated so that it is easy to follow. Designers will learn to use many of the basic 3D design functions, such as creating, re-sizing, rotating, grouping, duplicating and aligning objects.
*****************************************************************************
Required Resources:
To use the tutorial, you will need a computer with Internet access. If you are using the tutorial with a class, you would ideally be in a computer lab with one computer per student. The tutorials will also work well for distance learning, as long as your students have computers or tablets at home.
Prior to using the tutorial with a class, you should "create a class" on Tinkercad. Check out my free guide Tinkercad for Teachers if you are unfamiliar with the program.
To print the created project, you will need a 3D Printer and Filament (PLA filament recommended).
*****************************************************************************
Tips for in-class use:
• Option 1: Give each student a printed copy of the tutorial. Let them follow it at their own pace. This option is particularly useful for classes in which students' computer experience levels vary greatly.
• Option 2: Have each student open the video file or the Screen version of the tutorial. Show students how to have 2 windows open simultaneously on their computers. They should have the tutorial open in one window and Tinkercad open in the other. This option works best if your printing/copying resources are limited and your students are experienced computer users. This would also be a great option for distance learning.
• Option 3: Use a projector to display the tutorial. Have students follow along as you go through the tutorial step-by-step. This option will be the best for younger students and for those with limited computer experience.
*****************************************************************************
Other products that may interest you:
3D Print Your Light Switch Plate
3D Print Your Own Flexi Animal
*****************************************************************************
Follow Teach Me 3DP on TPT to learn about all of our latest products and sales.


