I is for Italic Calligraphy | Chancery Cursive | Lettering Workbook
- PDF
Description
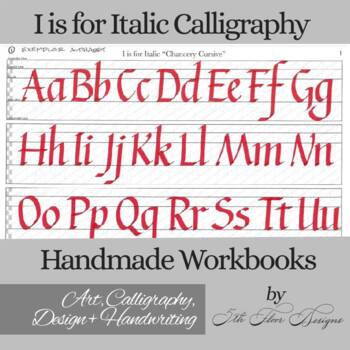
The goal of the I is for Italic Calligraphy (Chancery Cursive) Workbook is to learn a new way to draw creative letters and words. The workbook was created for a beginning to an advanced handwriter, or anywhere in between. The workbook is handmade with an actual hand, not a computer typed font, which makes it easier for the learner to replicate. The workbook leads the learner through systematic steps by learning how to warm-up hand muscles, learning basic letter strokes, to drawing/writing letters, letter spacing to make words and finally word spacing to make sentences. The workbook helps to establish a new way of writing letters with the hand-mind connection!
Art, Handwriting, and Design Class Lessons:
The workbook can be added to an elementary school's handwriting unit, to an art class journaling unit, or maybe a graphic design typography unit too.
Learning Standards:
WLP.K.2. With assistance, produce printed letters, words, and sentences with proper proportion, size, and spacing on grade-level appropriate paper.
a. Control size of uppercase letters between top and bottom lines.
b. Begin to print letters with proper proportions of ascenders and descenders (e.g., descenders
should approach lower dotted line, ascenders should approach top line, midpoints should align
with a midpoint dotted line).
c. With assistance, print whole words with correct spacing between letters (e.g., letters should not touch or “crash” into each other).
d. With assistance, print sentences with correct spacing between words (e.g., spaces between
words should be the size of an individual letter) and between sentences (e.g., spaces between
sentences should be the size of two letters).
Objectives:
Learners will be able to
- Analyze letters based on line placement of baseline, x-height, and ascender line given an alphabet.
- Learn how to warm-up hand muscles to get ready to write using a lined sheet.
- Learn the basic strokes of letters from a handwritten alphabet example.
- Draw the basic strokes to make lowercase letters given practice sheets.
- Draw letters in a different style derived from a print handwritten alphabet example.
- Write letters next to each other in an appropriate spacing using handwritten examples.
- Write words next to each other with appropriate word-spacing using handwritten examples.
Holding writing tool:
Use a tripod approach with thumb, index, and middle fingers. Lightly hold the tool without pressure.
Tools:
Pencil, pen, or fine markers for beginning warm-up + letter tracing
3.8mm Pilot Parallel Pen + refill ink
Similar size nib, holder + sumi ink
Workbook can be printed on any paper, higher the Ibs for an inky pen/marker would be beneficial.
Speed:
With any new drawing/handwriting style, the learner should always begin slowly with large letters on lined paper until mastery is achieved. Mastery is achieved without looking at a reference exemplar, or without using lines. Speed will come with practice and self-confidence in remembering and writing the letters. Lastly, the learner will magically be able to see the words on the page before they write them.
Lessons:
Lesson 1: Alphabet Exemplar
An alphabet exemplar should be used as a reference until the letters are committed to memory.
Study the exemplar how the letters are written from the bottom/baseline, through the middle/x-height to the top/ascender line. Use your hand to trace the letters to help with the hand-mind connection. Place a piece of tracing paper, or thin white paper over the alphabet to practice the letters by tracing each one. Have the alphabet next to the learner until all the letters are memorized.
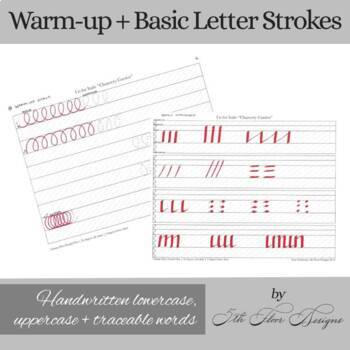
Lesson 2: Daily Warm-up
Daily warm-up ovals are a way to better your accuracy in your hand, control your writing medium, stop shaky lines, encourage hand-mind connection, and develop stronger fine-motor skills.
Students should use a pencil or pen to begin this lesson. Remember to start slowly. Students will trace over the circular ovals and move through the row, then should continue through the row on their own. Continue to work from the right-to-left, then back to left-to-right. When the learner is ready they can work on the next lesson. Make more copies of the warm-up sheet, or use regular lined paper. Get used to the behavior of warming up to write, every time you sit down to practice or handwrite.
Lesson 3: Basic Letter Stokes
A letter is actually drawn in parts known as basic letter strokes.
Work through each small part, which we call strokes, of the letter by first tracing and then writing them on your own. Be mindful of the position of the stroke in regards to the bottom/baseline, middle/x-height, and top/ascender line. When the learner feels like they have made great progress of replicating the strokes, then they should move to the next lesson.
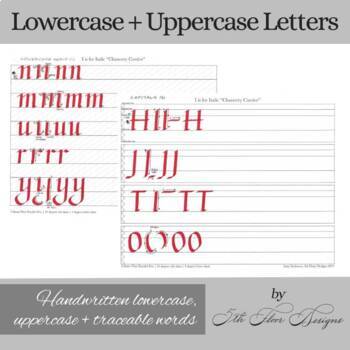
Lesson 4: Lowercase Letters and Numbers
Lowercase letters are the most important to learn how to accurately hand write since they make up most words when you write.
This lesson joins the basic letters strokes together to make the 26 lowercase/minuscule letters of the alphabet. The learner will work from a-z by first tracing the letter, then writing them on their own. Please notice the baseline and top ascender line. Some letters might go below the baseline to the descender line. Also, pay attention to the middle x-height. Overtime with daily practice, the handwriter will learn muscle memory, hand-mind connection with adding memory of each letter, and will be able to replicate letters over and over again with speed and accuracy.
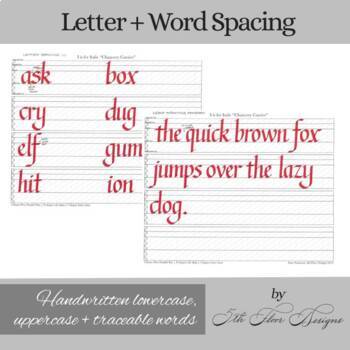
Lesson 5: Letter Spacing to Make Lowercase Words
Learning letter spacing is important to make words readable while practicing to create the right amount of space.
Now that the lowercase letters are established, the learner will begin to trace words with correct letter spacing, then begin to write on their own. The learner should continue to pay attention to the letters placed on the lines of the paper. With the many combinations of letters that come together to make words, the learner will begin getting used to drawing them next to each other. The more practice of words the better. The end of the workbook has ABC letter lists to help create more combinations of examples to practice.
Lesson 6: Word Spacing to Create Sentences
Word spacing is important for word readability and creating the same word spacing consistently when different words are used.
Now that the learner has confidence in how to write all the 52 letters (26 lowercase and 26 uppercase), they can begin practicing writing basic sentences, or pangrams. A pangram is a quote that has every letter in the alphabet. The more the learner writes, the more they will use their hand-muscle memory and activate their letter memory. Eventually, the learner will be able to see the words on the page before they write them.
Lesson 7: Uppercase Letters
Uppercase letters are used a minimum amount when handwriting or designing, but are still important due to the first letter of proper nouns and sentences.
This lesson joins the basic letters strokes together to make the 26 uppercase/majuscule letters of the alphabet. The learner will work from A-Z by first tracing the letter, then writing them on their own. Please notice the baseline and top ascender line. Some letters might go below the baseline to the descender line. Always, pay attention to the middle x-height. Overtime with daily practice, the handwriter will learn muscle memory, hand-mind connection with memory of letters, and will be able to replicate letters over and over again with speed and accuracy.
Practice:
Try to practice 10 mins a day for 5 days. As you know the saying goes, if you don't use it, then you lose it; the same goes for handwriting. Practice each day analyzing letters, warm-up ovals, and writing. Find a penpal, or handwrite notes to family and friends. Start a creative journal to write and draw in. Follow fellow hobbyists on Instagram to see them write, draw, and design. Practice makes progress!
Resources:
Handwriting Learning Standards
https://media.zaner-bloser.com/hw21summit/public/Written-Language_ProductionStandards.pdf
Speedball Textbook 14th Edition, 1941
https://www.printmag.com/branding-identity-design/the-speedball-textbook/
International Association Master Penman, Engrossers, and Teachers of Handwriting
https://www.iampeth.com/


